| Photo 9 |
 |
|
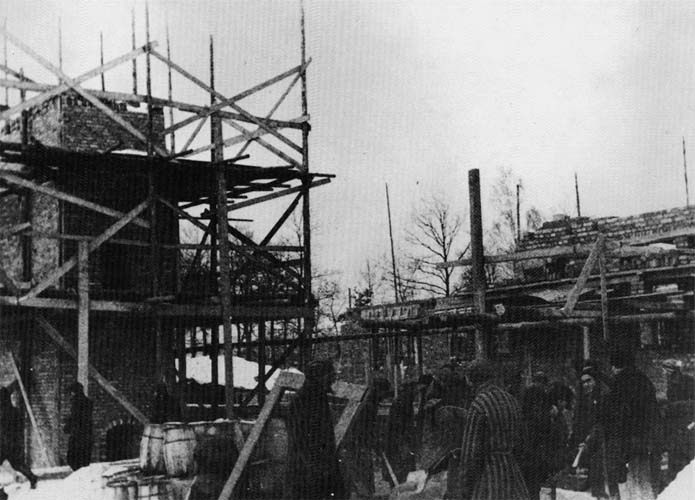
Photo 9:
[PMO neg. no. 327, Ludwik series and 20995/492, Kamann series] |
| |
View of the central part of Krematorium III, Birkenau worksite “BW 30a”, on a southeast/northwest line, taken between 20th and 22nd January 1943.
From left to right: the collective chimney for all the furnaces at a height of about 8 meters, about half its final height; covered by snow, the temporary roof protecting Leichenkeller 2 (the future undressing room); in the center, the western end of the northern ground floor wall; lastly, on the right, the southern wall under construction.
At its base, the collective chimney had three openings to which the underfloor furnace flues led (the one visible here is for the flues from cremation furnace 5 and the waste incinerator), and which were subsequently covered over. Higher up, there were three rectangular openings (one is visible here) connected with the (suction-type) forced-draught system, which was never actually installed in Krematorium III because of the problems encountered with it in Kr II.
This photo is incorrectly presented in Auschwitz Museum publications as showing “Prisoners employed on the construction of IG Farbenindustrie premises” |
|
|
| Photo 10: |
 |
|
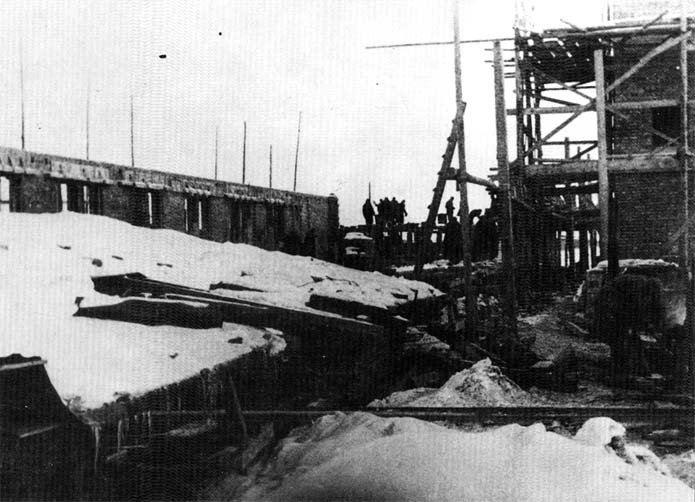
Photo 10:
[PMO neg. no. 20995/490, Kamann series] |
| |
View looking west/east of the central part (future furnace room) of Krematorium III (BW 30a) under construction, taken the same day as Photo 9, hence between 20th and 22nd January 1943. Bottom left is the snow-covered temporary roof protecting Leichenkeller 2. Above this is the north wall of the building, with at the far end, visible almost as dotted lines, the places where the ends of the partition walls of the rooms of the northeast part of the buildings are to fit. The east wall is under construction, as is the chimney, which has reached about half of its final height of 16 meters.
A few days later, Kamann climbed to the first stage of the chimney scaffolding to photograph the temporary roof of Leichenkeller 2 [Photo 12 below]. |
|
|
| |